One aspect of writing these posts, that I haven't quite mastered yet, is choosing titles. Ideally, I'd like to maximise the number of people that fall into the intersection of the Venn diagram comprised of 'those to whom my content is meaningful' and 'those that end up clicking on my website'. And my post titles are usually the most important factor! This time again, it was a doozy, since hexagonal grids are transverse to multiple fields.

A little bit of Terminology
Depending on the context, a hexagonal grid can be called a number of different things. However, for creative coding purposes I think that the term 'Grid' is the most fitting. When I started working on this post, I wanted to call it a 'A guide to Hexagonal lattices', but in some way that is misleading. Googling the term 'hexagonal lattice' yields a bunch of research papers, that study 'lattices' in the context of Crystallography, micro structures and other fields of science that I have absolutely no clue about. So even though the term lattice literally means 'and interlaced structure', it implies some sort of functional purpose.
Interestingly, John Conway coined it the hextille. Which also has a nice ring to it, but I couldn't find out why, when or for what purpose he gave it this name. I assume he was studying different types of tilings. Hence, for geometric purposes we could also call it a 'hexagonal tiling' or 'hexagonal tesselation'. Note that the field of Tesselation is not only interesting to those looking to decorate their bathroom, but it is in fact a vast and incredibly interesting field of mathematics. You can dip your toes into it with this Veritasum video. Lastly, we could also call it a 'Honeycomb' due to it's resemblance to a beehive's structure. Which term do you think is the most appropriate one?
Terminology aside, I've made a list of three methods that one can use for the construction of such a grid. We'll discuss each one in the following sections. Here's a quick index:
- Drawing a Single Hexagon in p5
- Constructing a Hexagonal Grid
- Hexagon Spiral
- Spiral Method Compact
- Recursive Method
Drawing a Single Hexagon in p5
The first step we need to tackle, is how to actually draw a singular hexagon in p5. I believe that the most sensible approach to doing so is by using trigonometry, and a property of equilateral polygons.
A regular polygon satisfies two properties: it is equiangular and equilateral. Meaning that the value of it's vertex angles are equal, and it's sides are of equal length. In this manner, the vertices of any regular polygon, with any number of sides, all lie on a common circle. We can leverage this property to construct our hexagons (or any other regular polygon for that matter).
A full circle has 360 degrees, or equivalently TAU radians (TAU == 2 * PI). Constructing any regular polygon thus boils down to splitting 360 degrees by the number of sides that the desired polygon has. In the case of a hexagon, we divide a full rotation of 360 degrees by 6, ending up with a value of 60 degrees. We can now use this knowledge to position the hexagon vertices in an equiangular manner around a circle:
// Function that draws a hexagon (or any other regular polygon)
// centerX and centerY determine where the polygon is positioned
// the radius parameter determines the size of the enclosing circle
// numSides specifies the number of the polygon's sides
function drawHexagon(centerX, centerY, radius, numSides){

  // p5 already has some functionality for drawing more complex shapes
  // beginShape tells p5 that we'll be positioning some vertices in a bit
  beginShape()

  // This is where the heavy lifting happens
  // Make equiangular steps around the circle depending on the number of sides
  for(let a = 0; a < TAU; a+=TAU/numSides){

    // calculate the cartesian coordinates for a given angle and radius
    // and centered at the centerX and centerY coordinates
    var x = centerX + radius * cos(a)
    var y = centerY + radius * sin(a)

    // creating the vertex
    vertex(x, y)
  }

  // telling p5 that we are done positioning our vertices
  // and can now draw it to the canvas
  endShape(CLOSE)
}
Go through the code and have a look at the comments, they should explain the purpose of every statement. We make use of P5's beginShape() and endShape() to draw our hexagon. Also make sure to add the 'CLOSE' statement in the endShape() function to close up our hexagon. Here's a condensed version of the function:
function drawHexagon(cX, cY, r){
  beginShape()
  for(let a = 0; a < TAU; a+=TAU/6){
    vertex(cX + r * cos(a), cY + r * sin(a))
  }
  endShape(CLOSE)
}
Since we're only going to draw hexagons, we can also omit the numSides input parameter. Also make sure to have a strokeJoin(ROUND) somewhere in your code, otherwise the corners of the hexagon will have little pointy horns! Next up is how to draw a bunch of hexagons and arrange them into a tightly packed grid.
Constructing a Hexagonal Grid
At first I wanted to call this the 'naive' way of constructing a hexagonal grid, but I don't think it deserves to be labeled as such, since occasionally it has advantages over the following methods (depending on the sketch you might want to do it this way). I believe that the caveat here is thinking of a hexagonal grid, just as a 'grid', when it is a lot more than that!
Essentially, we'll construct our grid with a nested for loop, in the same manner that we would construct a rectangular grid:
Ok, so we got a grid... but it doesn't look right at all! The hexagons are arranged, just as if they were sitting on top of a rectangular grid. After all, we programmed it in the same way. We'll have to make a couple of modifications! Also note that we are dividing the value passed to the drawHexagon() function by two, since we need to pass a radius and not a diameter.
First, let's horizontlly space out this grid a little more. We can do so by multiplying the increment of the inner loop by 1.5:
for(x = 0; x < gridWidth; x+=hexagonSize*1.5){}
Next up, we'll have to offset every other row. To accomplish this we can keep track of the row number with an additional 'count' variable:
function makeGrid(){

  count = 0 // init counter

  for(y = 0; y < gridHeight; y+=hexagonSize){
    for(x = 0; x < gridWidth; x+=hexagonSize*1.5){
      drawHexagon(
        x+hexagonSize*(count%2==0)*0.75,
        y,
        hexagonSize/2
      )
    }

    count ++ // increment every row

  }
}
Here we're using a little boolean trick to add a horizontal offset whenever the count variable is even! (so basically every other row). We could do it in the following manner:
if(count%2 == 0){
  drawHexagon(x + hexagonSize*0.75, y, hexagonSize/2)
}else{
  drawHexagon(x + hexagonSize, y, hexagonSize/2)
}
This is a bit wordy, and can be replaced by the little statement (count%2==0), which will evaluate to 1 when it's true and 0 when it's false. And since we're wrapping it in parentheses and enclosing it with arithmetic operators, it will be parsed as an integer. Hence when it is true, the offset is applied, otherwise the offset gets multiplied by zero and has no effect on the overall position. Neat, right?
The overall grid looks a bit better now, but we're not quite there yet, we need to lessen the vertical distance between the rows, which can be done by dividing the vertical increment by a value of 2.3:
function makeGrid(){
  count = 0
  for(y = 0; y < gridHeight; y+=hexagonSize/2.3){
    for(x = 0; x < gridWidth; x+=hexagonSize*1.5){
      drawHexagon(
        x+hexagonSize*(count%2==0)*0.75,
        y,
        hexagonSize/2
      )
    }
    count ++
  }
}
And we end up with a neatly packed hexagonal grid! Here is a working example, try to change the hexagonSize parameter and see the grid at different scales:
Hexagon Spirals
Rather than drawing a grid in a top down, left to right manner, this method starts at a given point and paves it's way outwards spiraling around the already drawn hexagons. Here's a visualization of how this works:
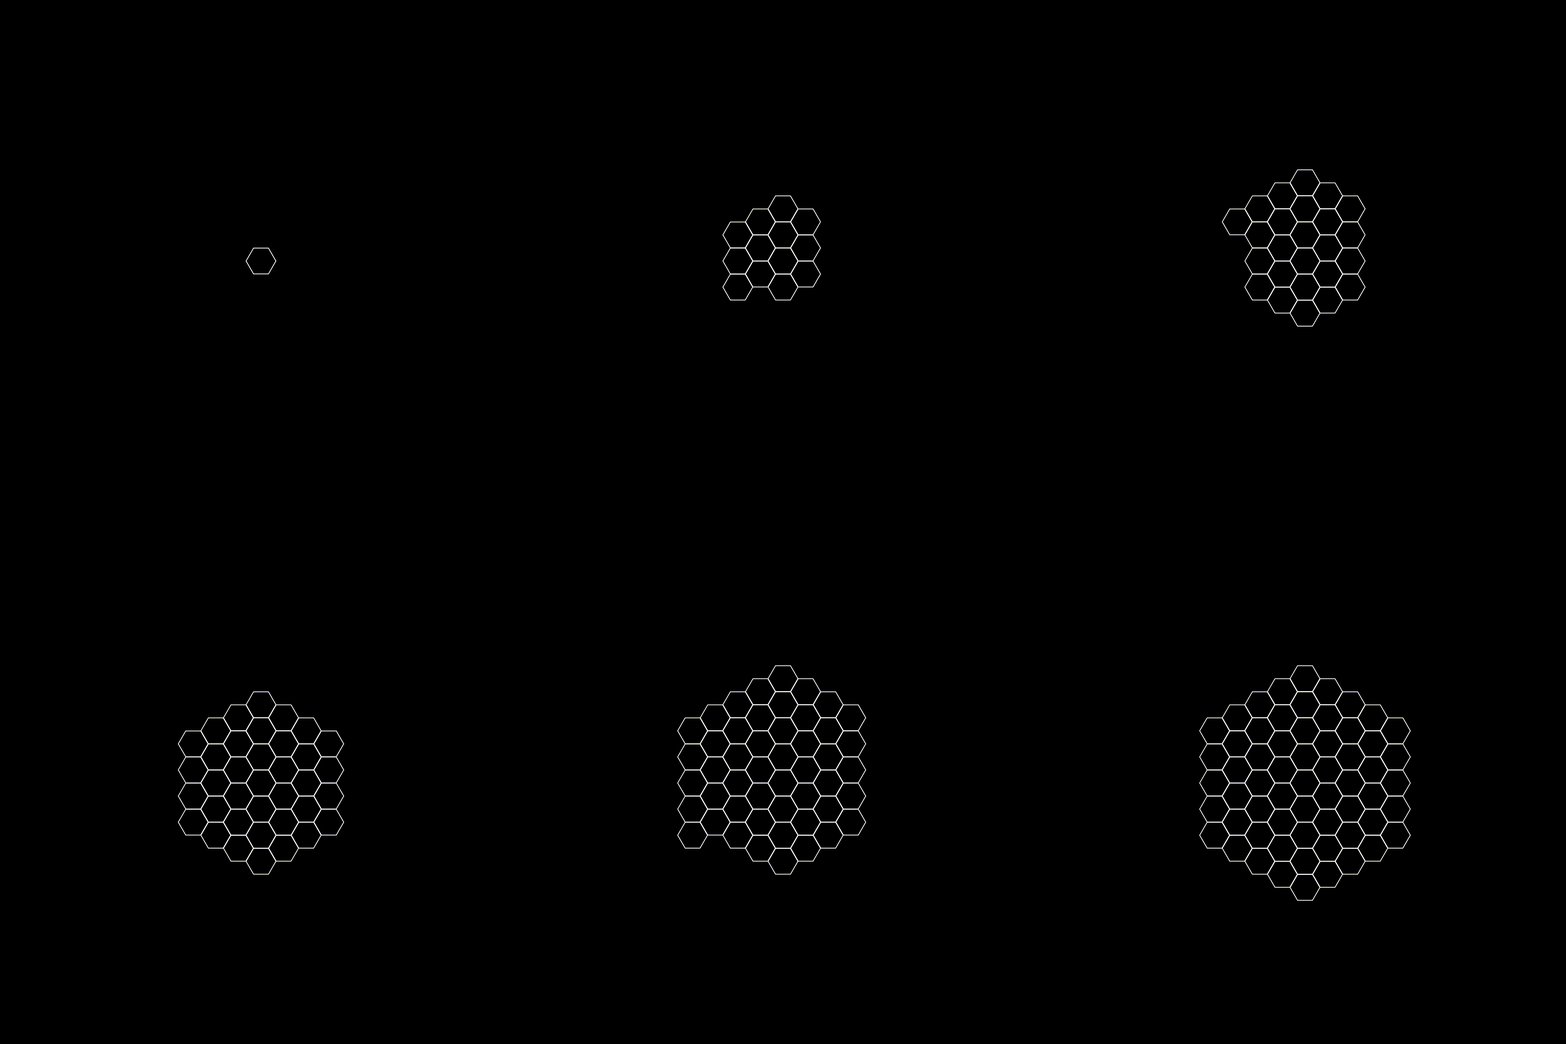
Here's one way to create this hexagon spiral, that simply makes use of a number of sequential for loops to do so:
// modified from: https://stackoverflow.com/a/2143499
function makeSpiral(centerX, centerY, size, count){
  var x = 0;
  var y = 0;

  s = size/1.75

  push()
  translate(centerX, centerY)
  drawHexagon(centerX, centerY, size/1.75)
  for(let n = 0; n
This is pretty straightforward, we are stepping around an initial hexagon paving our way with other hexagons outwards. We do this by incrementing two counters x and y that specify the position of the drawn hexagons (we need to multiply by the hexagon size to get the right spacing). The further out we go the more hexagons we need to draw on a line/side, this is determined by the variable 'n' in the outer loop. In this manner the count variable controls the number of hexagons that will be found on the longest outer side of the final hexagon cluster.
However, if you run this snippet as is, you'll notice that the final cluster doesn't quite look right:
We still need to apply a transform to the position of the drawn hexagons and skew them into the right spot. In that manner our hexagon function becomes:
function drawHexagon(cX, cY, r){
  hx = cX + cY/2
  hy = sqrt(3)/2 * cY

  beginShape()
  for(let a = TAU/12; a < TAU + TAU/12; a+=TAU/6){
    vertex(hx + r * cos(a), hy + r * sin(a))
  }
  endShape(CLOSE)
}
And a working example of this:
You still might need to add a final loop that completes the missing chunk of the honeycomb. If you want your grid to feel the entire canvas, I would opt for the grid method, since it won't draw unecessary hexagons offscreen.
Spiral Method Compact
If you don't like 6 separate for loops, we can do the same thing with only one and a tricky calculation. Here goes the compacter version:
// modified from: https://stackoverflow.com/a/43913544
function makeSpiral(centerX, centerY, radius, count) {
    var x = centerX
    var y = centerY
    var angle = TAU / 6
    var side = 0

    drawHexagon(x,y,size/1.75)
    count--;
    while (count > 0) {
        for (var t = 0; t < floor((side+4)/6)+(side%6==0) && count; t++) {
            y = y - radius * cos(side * angle);
            x = x - radius * sin(side * angle);
            drawHexagon(x, y, size/1.75);
            count--;
        }
        side++;
    }
}
Essentially we're still doing the same thing! Similarly to it's little sibling, we're stepping in a spiral around our initial hexagon, gradually going outwards, but with the different that we do all of this with a single for loop! Here we also keep track of our position with the x and y variables:
y = y - radius * cos(side * angle);
x = x - radius * sin(side * angle);
The variable 'side' being the indicator that tells us in which direction we need to step next (multiplied by the angle). Now the inner for loop just needs to be able to determine how many steps we need to take before we are required to increment the side variable and change direction. This is accomplished in the condition statement of the for loop and is a bit heavy to digest, so let's go through it step by step! Let's have a look at what this calculation does:
floor((side+4)/6)+(side%6==0)
The best way to explain this is by going through the first couple of iterations of the for loop. Say the 'side' variable is 0 at the very beginning, then the statement floor((side+4)/6) will evaluate to zero and the statement side%6 == 0 evaluates to 1 because it is true. In this case we will draw exactly one hexagon located straight above our initial hexagon (because 0 * TAU/6 is 0):

Next we decrement the count variable and increment the side variable (note that the side variable gets incremented outside of the for loop). Repeating the same thought process we proceed: floor((side+4)/6) will again evaluate to 1. In fact, it will evaluate to 1 for the first 5 iterations. Only on the 6th iteration will it evaluate to 2, since we need to step in the same direction twice:
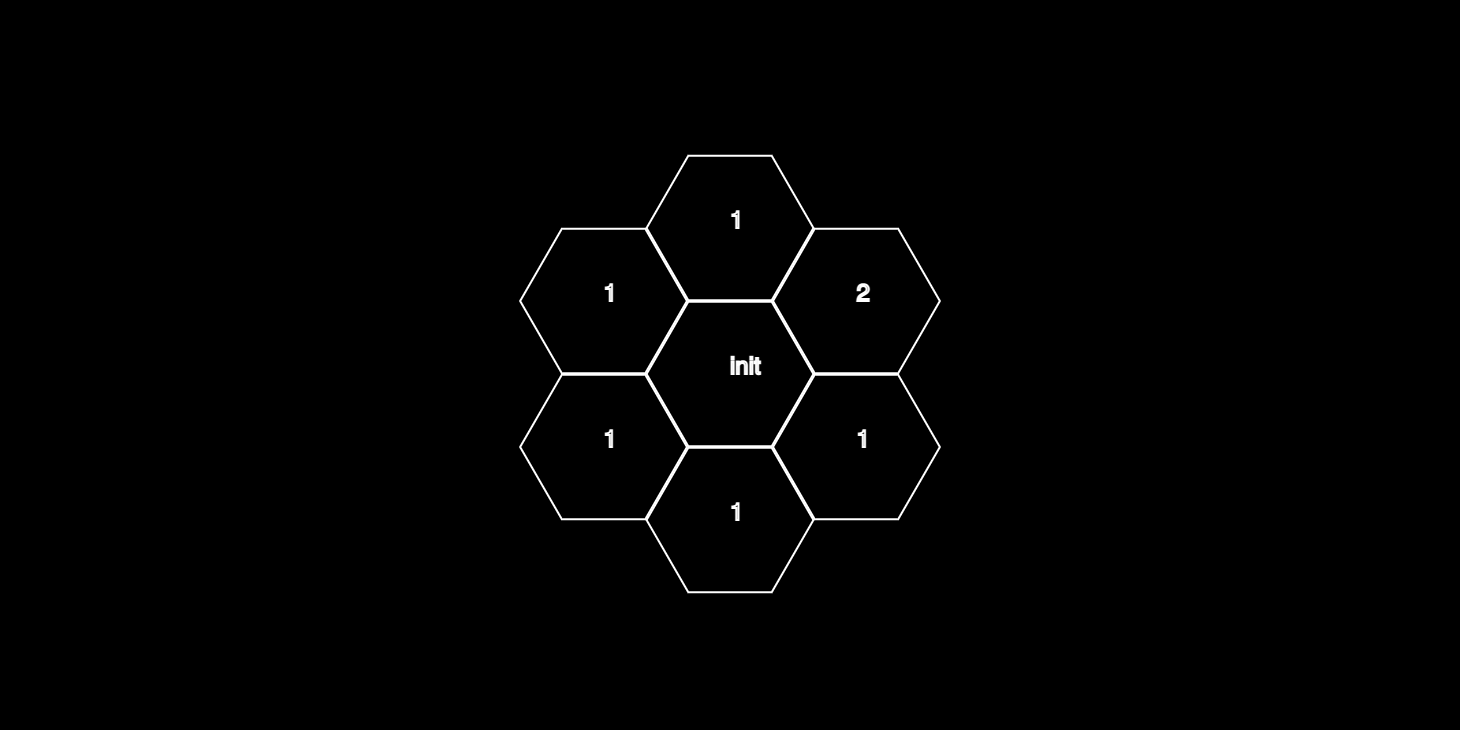
Essentially the neat little formula in the for loop condition tells us how many steps we need to take in one direction, before we should increment the variable 'side' and make a turn paving new hexagons onto a new side of the hexagonal spiral.
Why do we need (side%6==0) in the condition? Well, every loop we make around, we're gonna need one extra additional hexagon to begin a new lap around. This happens when the 'side' variable assumes a multiple of 6. So basically, every time we complete six sides.
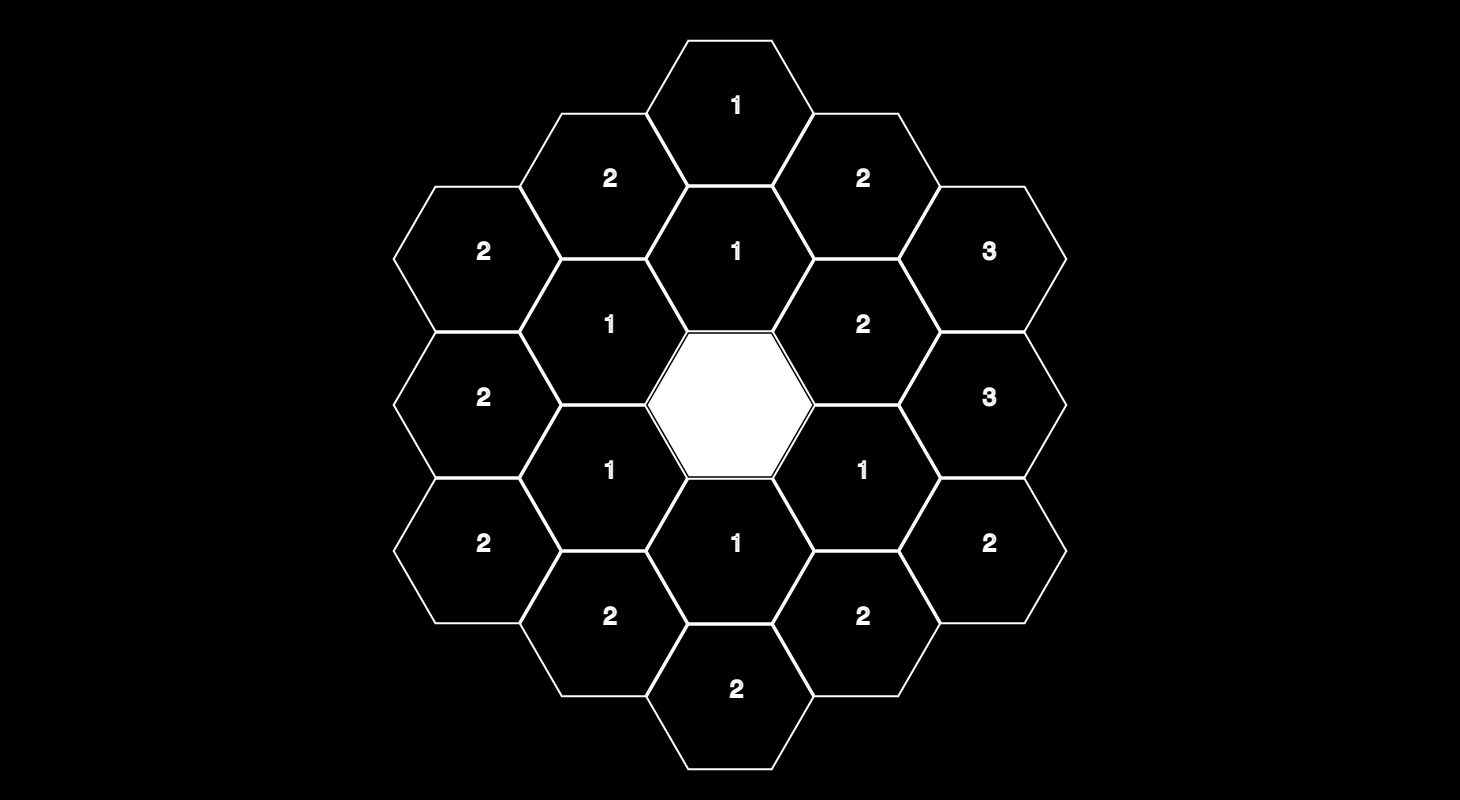
And this wraps up the spiral method! This one is probably my favorite of the three methods, since it allows for some fun shenanigans in animations, especially in SDFs we can pass the spiral index of the hexagons, and have some outward, or inward going motion.
Recursive subdivision method
This is actually the first time that I write about a recursive method on the blog. So for the uninitiated, a function is denoted as 'recursive', when said function invokes itself from within itself. Naturally, if done wrong, you'll end up with your machine exploding! But when done correctly you can achieve some pretty neat results, and often feels really satisfying! Hence, to achieve a recursive hexagonal grid, we'll construct it in the following manner:
function recursiveHexagon(cX, cY, depth, r){
  if(depth == 0){
    drawHexagon(cX,cY,r)
  }else{
    for(let a = 0; a 0){
        recursiveHexagon(cX,cY,depth-1,r/2)
        recursiveHexagon(x,y,depth-1,r/2)
      }
    }
  }
}
Generally, recursive methods consist of two parts, namely a 'base case' and a 'recursive step'. The recursive step, is simply the part where the function calls itself. The base case on the other hand serves to protect from a problem that often occurs with recursive methods. The base case prevents the recursive function calling itself in an infinite loop, and usually terminates execution, such that the pending function calls can resolve (similar to the stack in MTG).
For our purposes we make use of a parameter called 'depth', that gets decremented by 1 each recursive call, by passing 'depth - 1' to the recursive call. If this depth parameter becomes zero, we stop recursing. Note, that our method actually makes 6 recursive calls! Here's how this works:


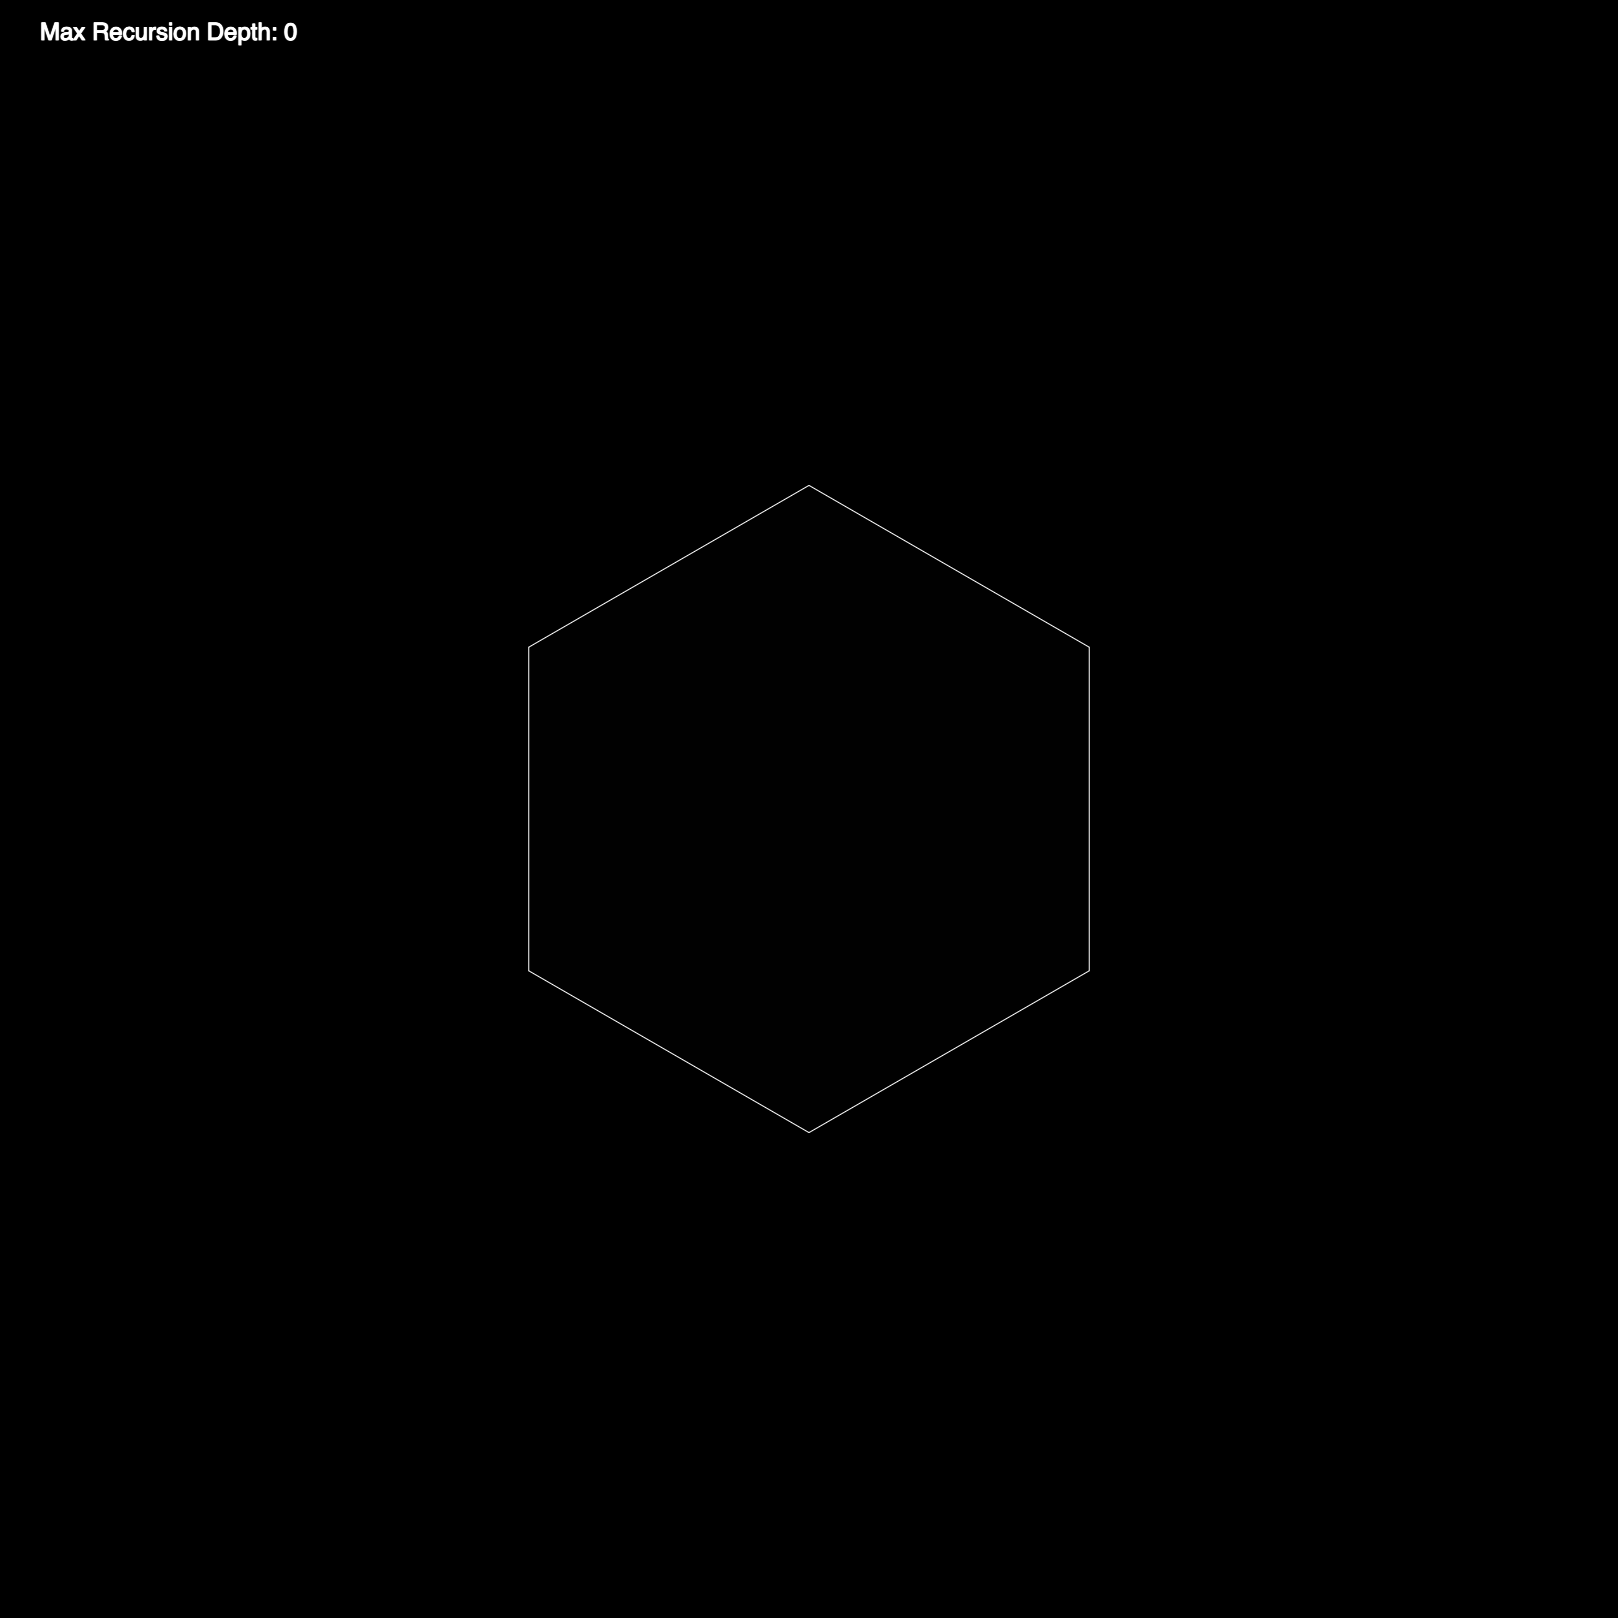
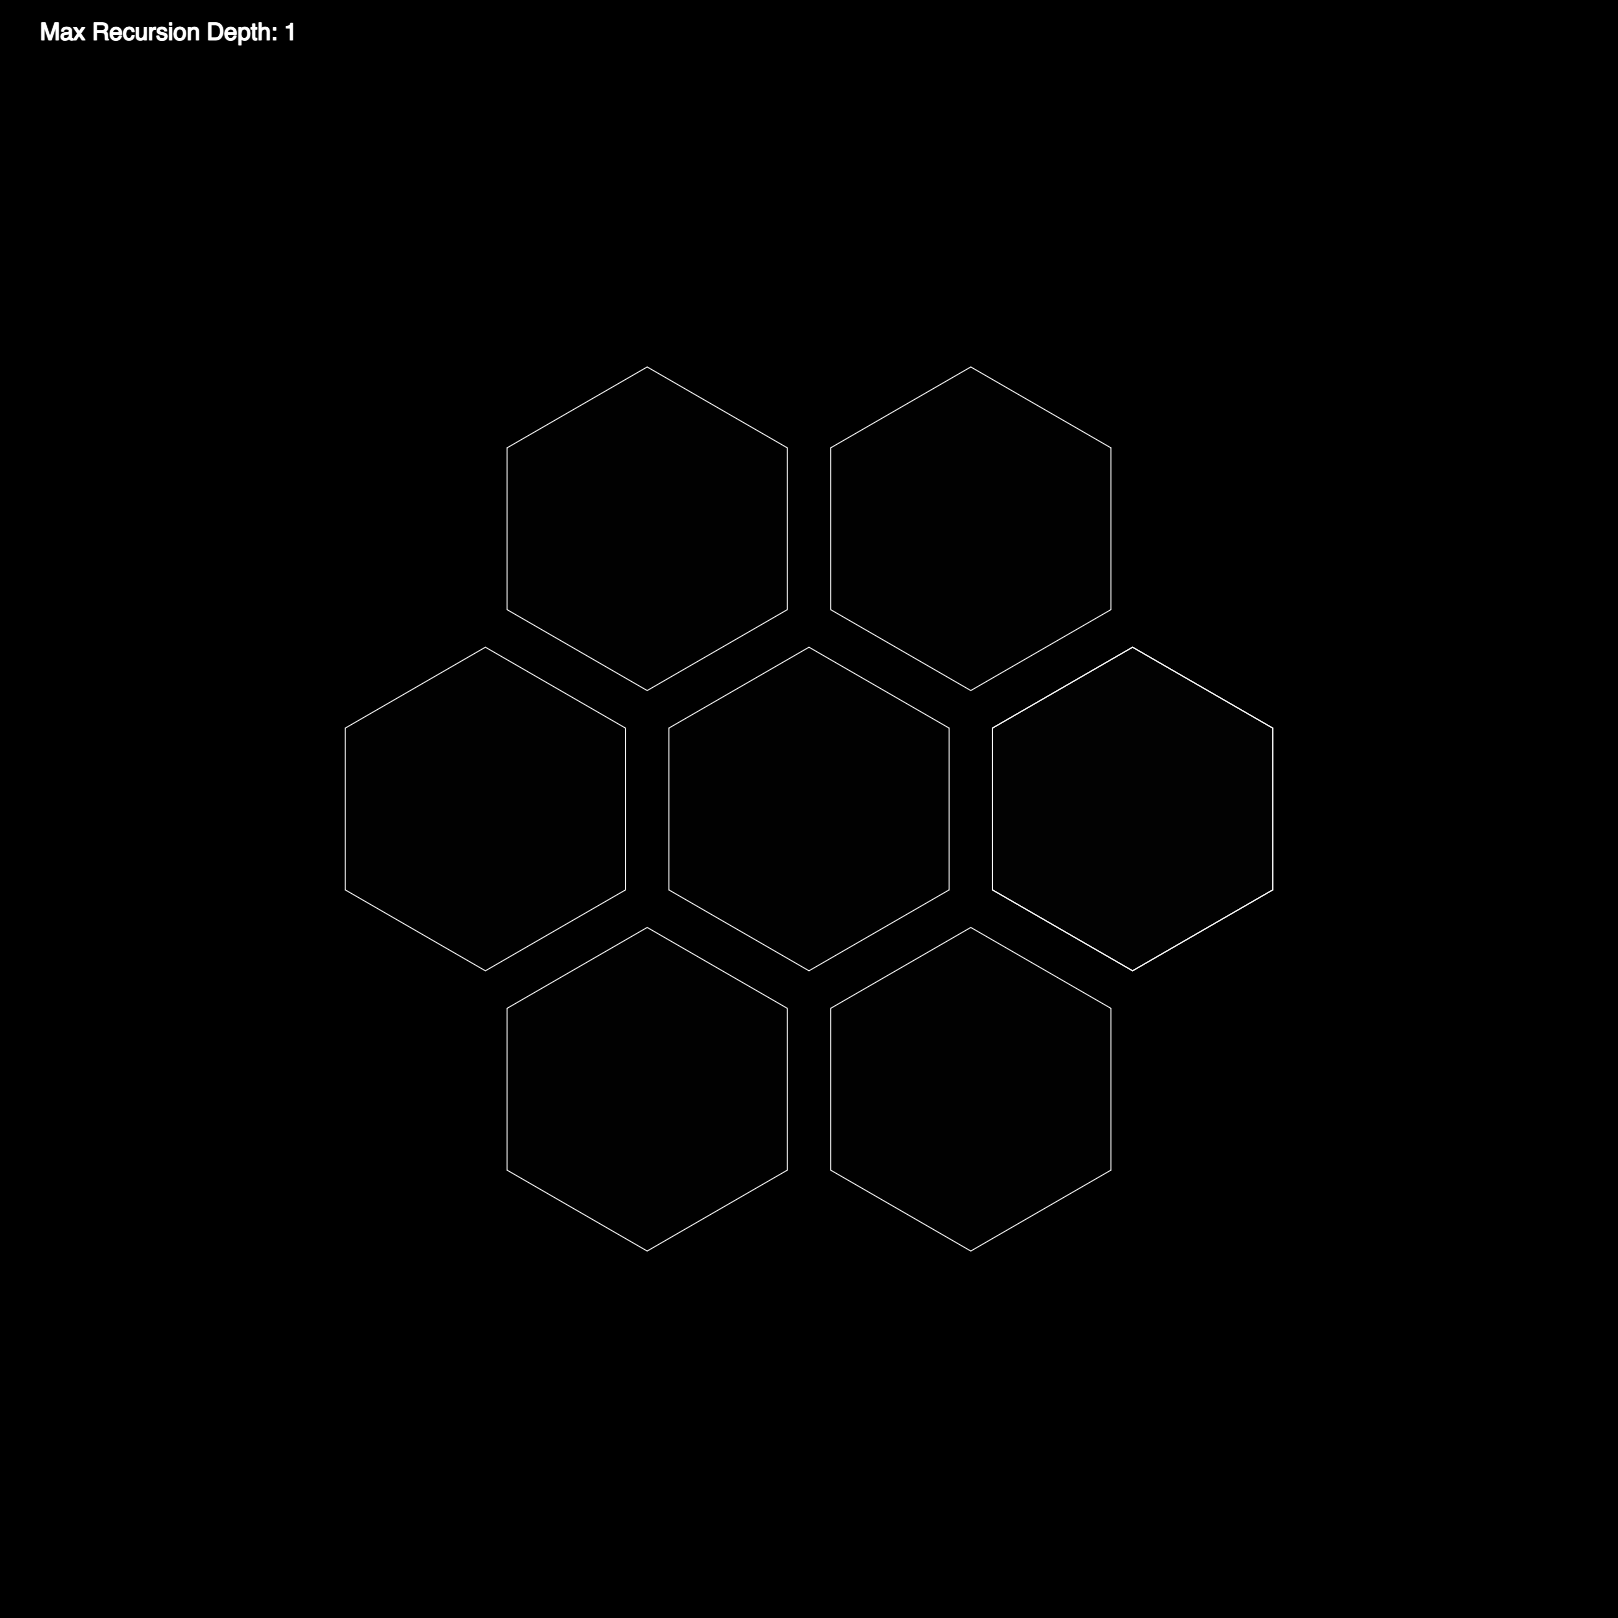
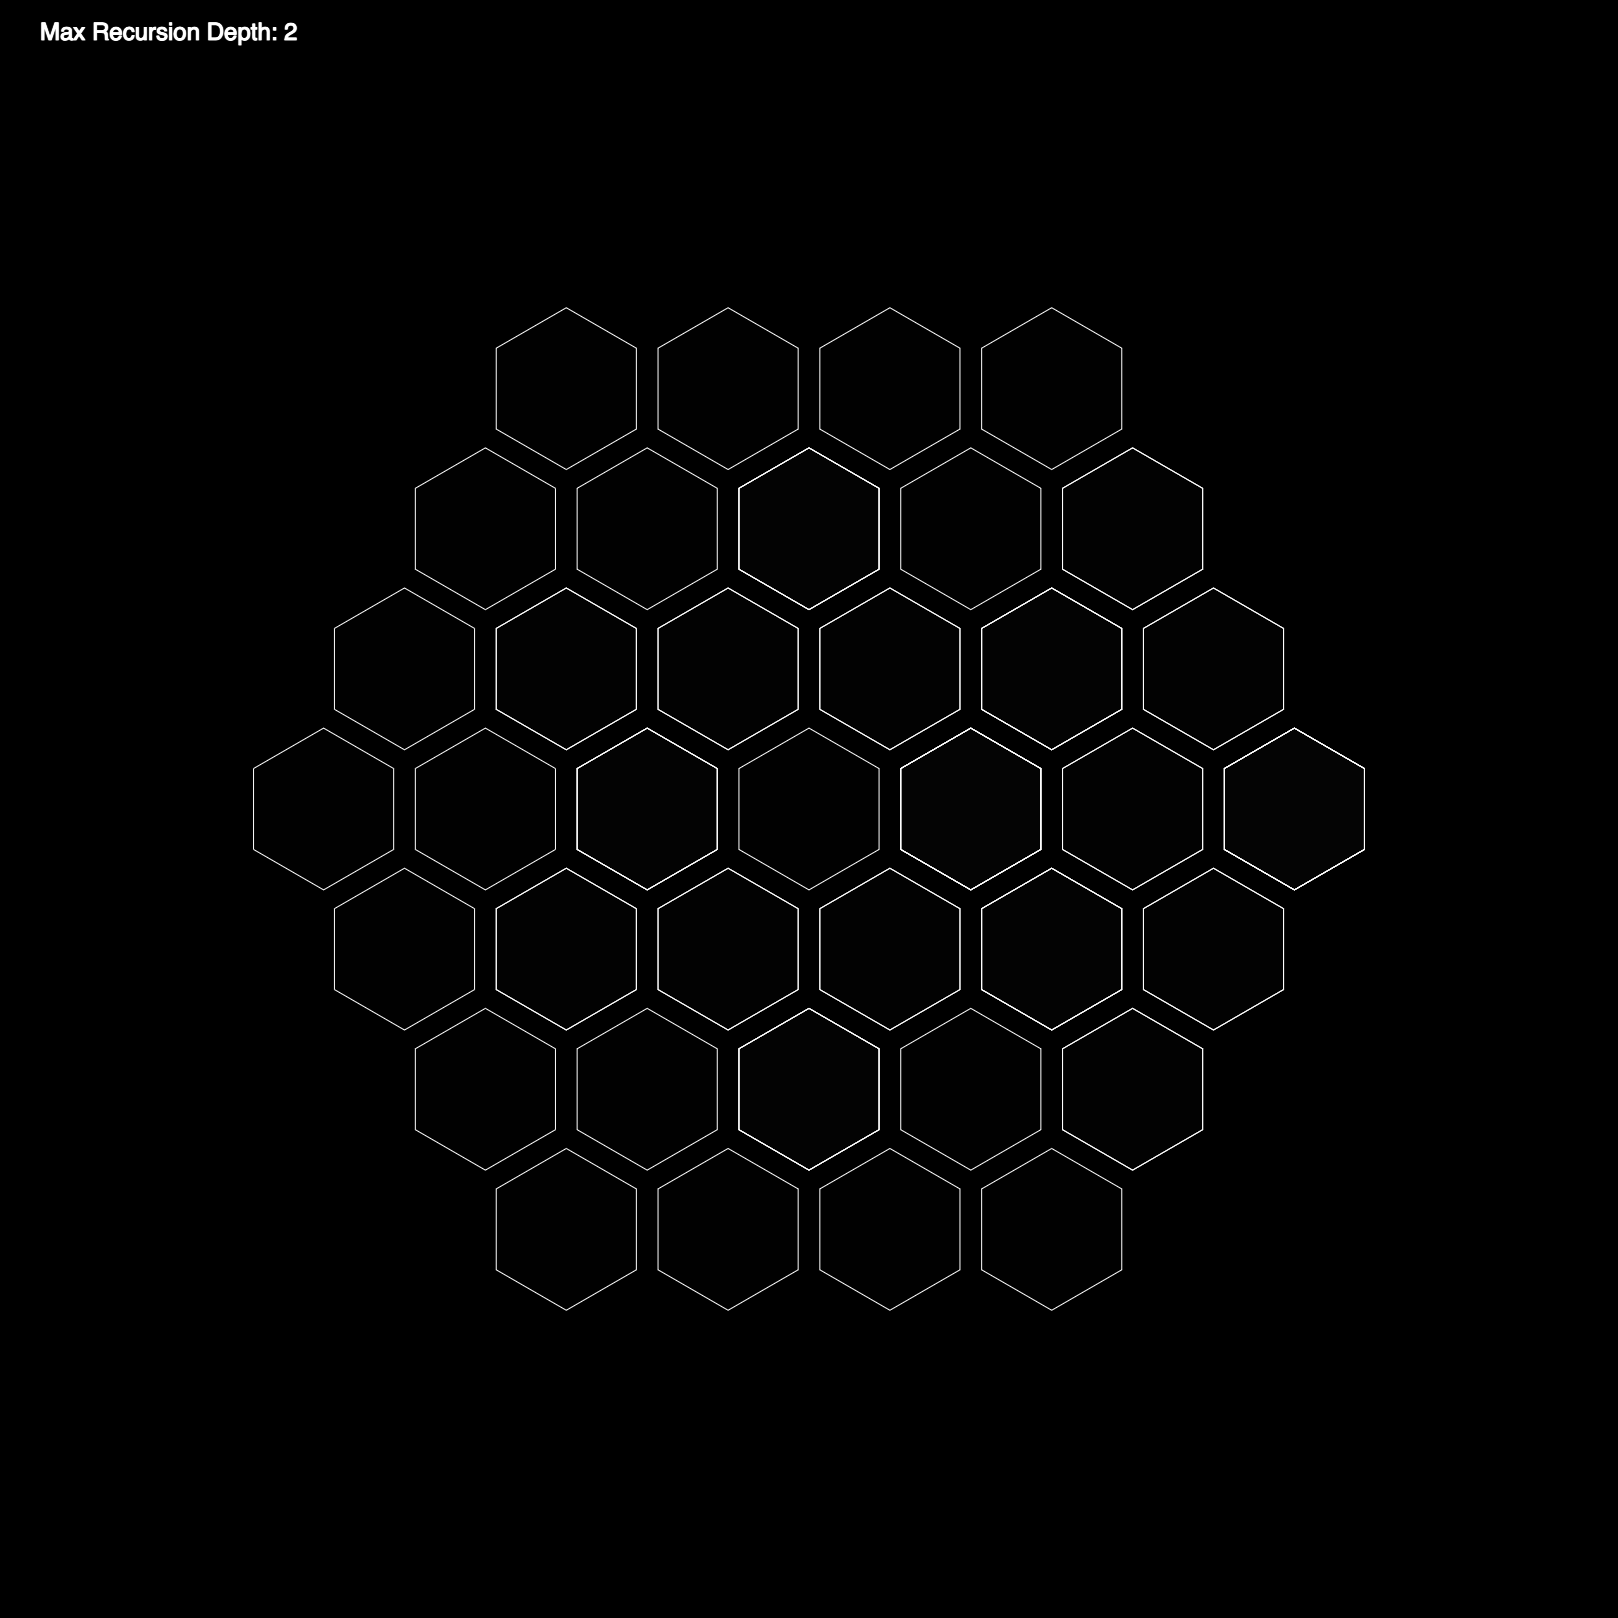
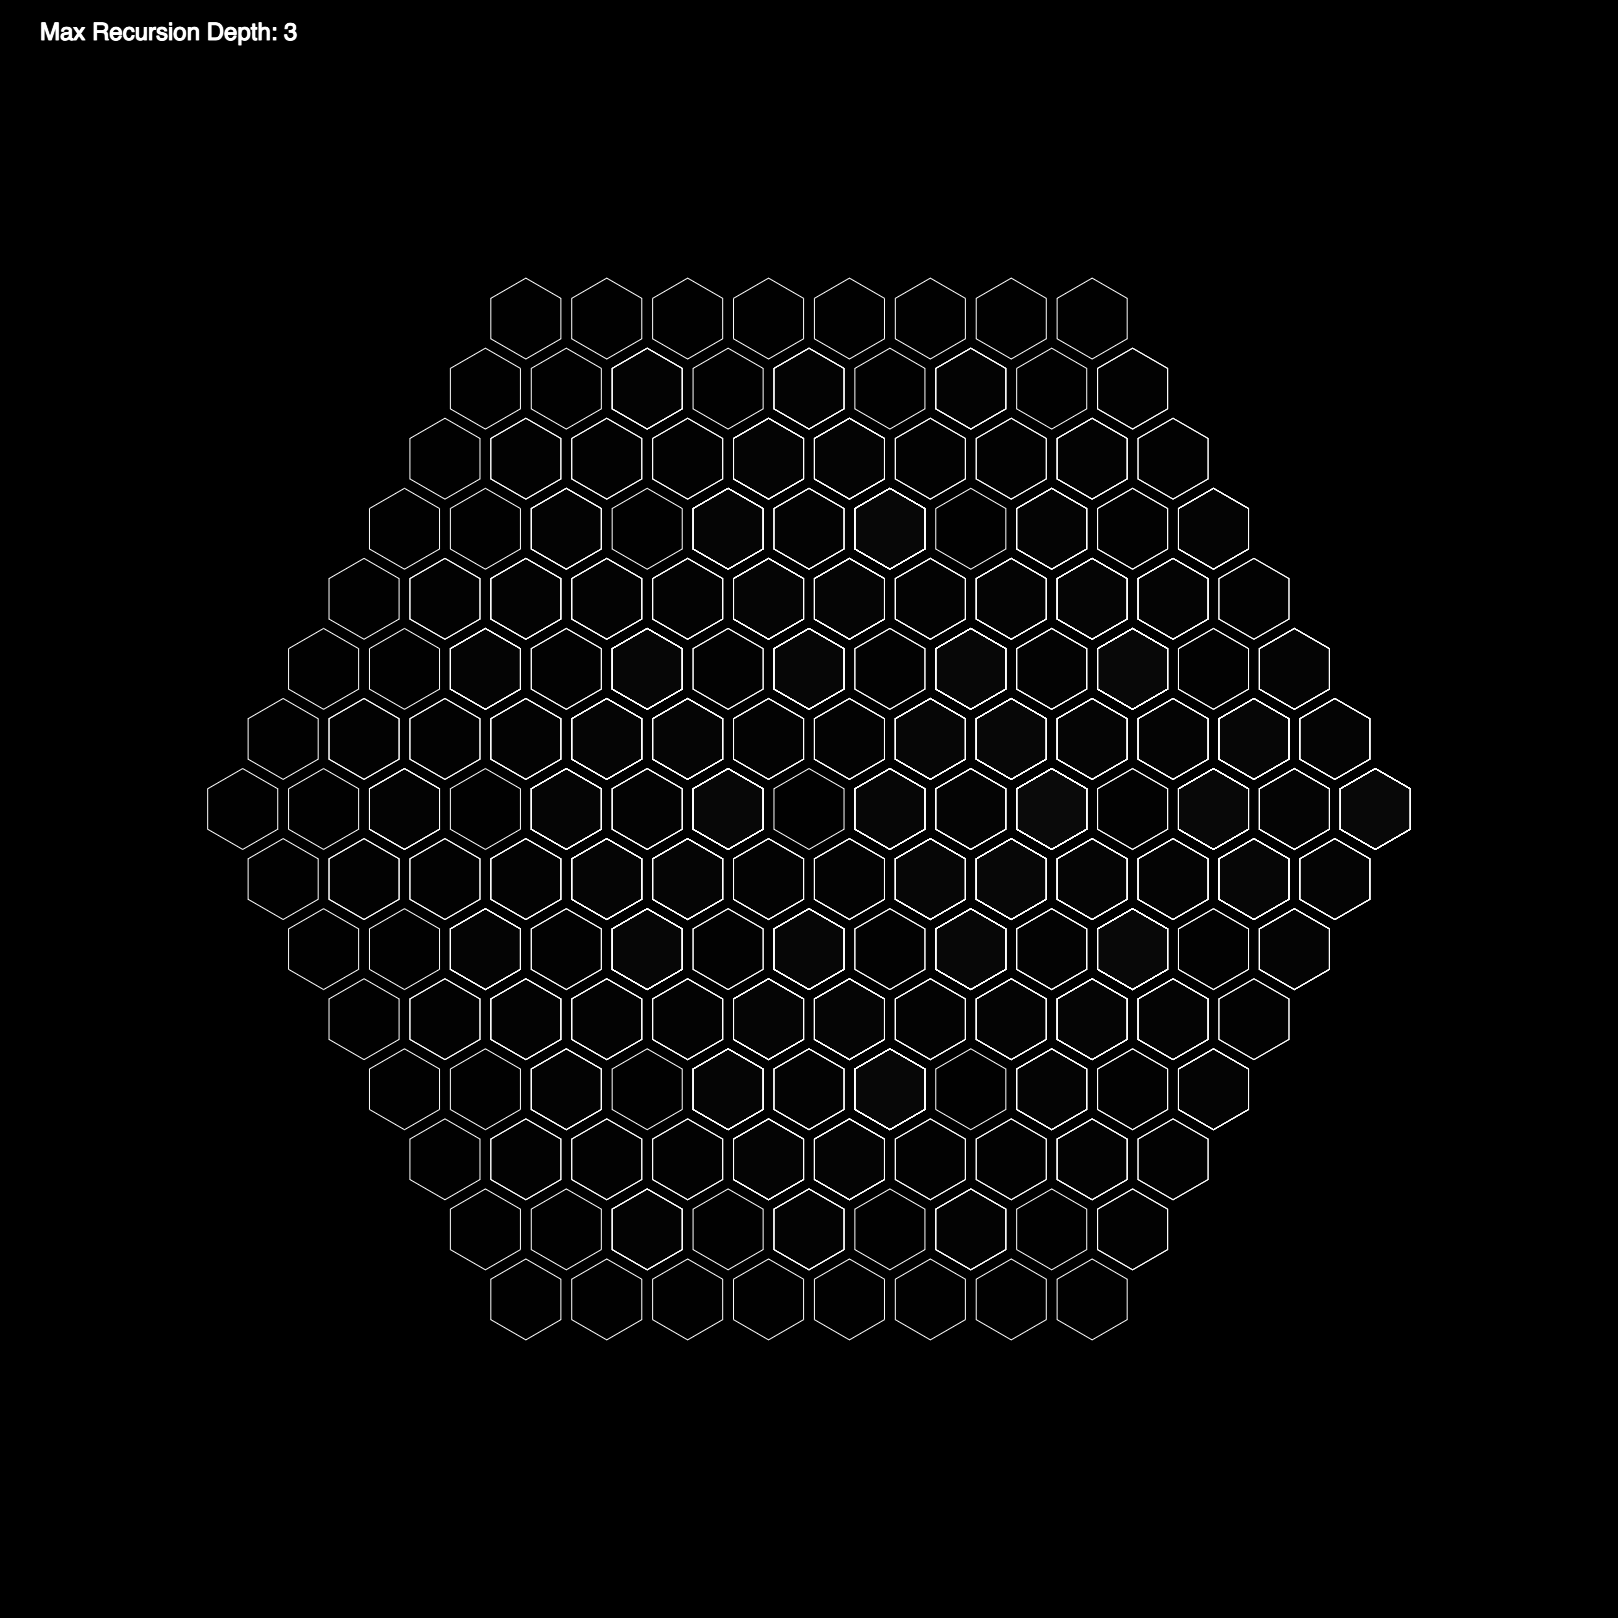
Hexagons have this beautiful self-symmetric property, that you approximately get another hexagon when you place a half-size hexagon at each vertex of the original hexagon! (plus one at the center) We leverage this for our recursive method, each call placing smaller hexagons at the vertices of the previous ones. Here's a working example:
Here, the base case is when we reach a depth equal to 0. If that is the case we simply draw a hexagon with a radius of r. If that is not the case, we replace our hexagon by 7 new recursive calls, that will either terminate with the base case, or keep recursing until the base case is reached. Thus, simply by setting the 'maxRecursionDepth' paramter, we can control how many subdivision we want to achieve.
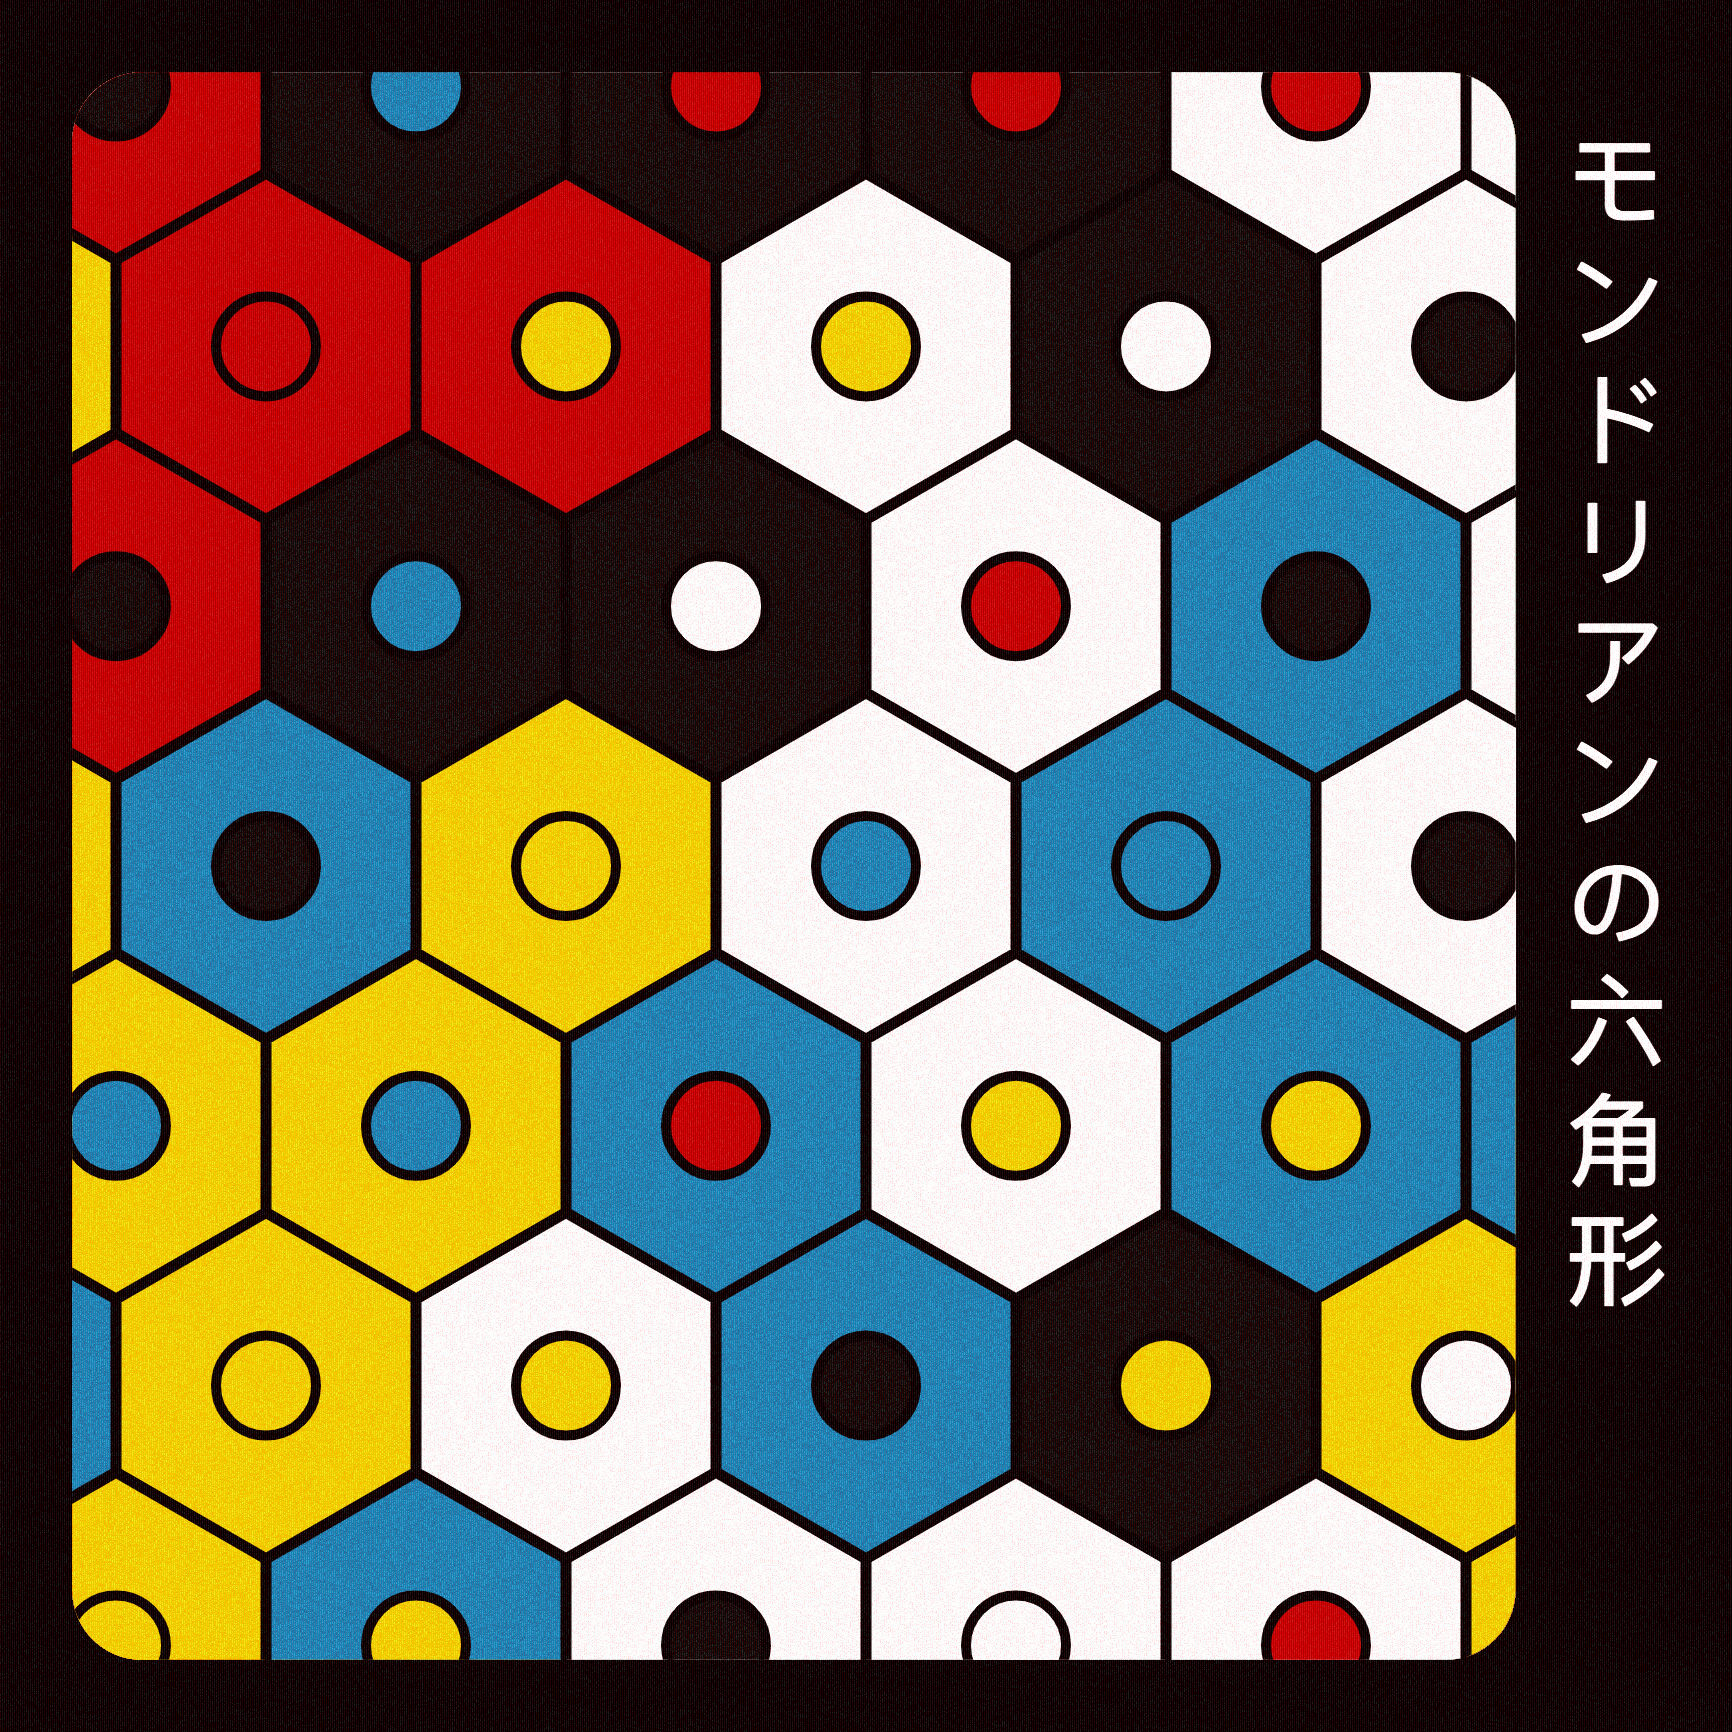
Hope this post was useful to you and gets you started with your own hexagonal endeavors. There so much more to explore down the line with regarding tesselation and hexagonal arrangement. Even Truchet tiling is applicable! I hope you enjoyed this post, learned something new and/or got inspired! Happy sketching! Here are a couple more sketches based on hexagonal grids:

Additionally, if you want a really extensive resource on hexagonal grids, that is sort of more oriented towards game development, you should definitely check out this page by redblobgames that's been constantly updated over the course of several years!
