
- Introduction
- What are Flow Fields?
- Components of a Flow Field
- The GridAngle Object
- Array Lists in Java
- Populating the Grid
- Drawing the Grid
Introduction
This is the 5-th and final part of the explorative series on Perlin Noise, where I explain how to code up a Flow Field, and this time we'll take a step away from P5JS and do it in Processing. Technically, all of this is possible and maybe easier to program in P5 but for efficiency reasons Processing is the framework of choice. This post might end up being a little bit lengthy and tough, but is definitely worth the trouble.
The code outlined in this post is loosely based on Tyler Hobbs pseudocode on flow fields in his excellent essay on them, which I recommend reading and maybe even taking at stab at implementing the pseudocode outlined in it, before following this tutorial. Naturally, my code is probably different, and merely shows a rough idea of what you can do with flow fields. Also note that the code shown here is far from optimal and equivalently is not the only way to create flow fields, but gives a basic idea about the steps involved in making one.
What are Flow Fields?
Flow Fields are a concept borrowed from fluid mechanics, and essentially simulate the behaviour of some substance (that has certain properties) over a surface or within a volume. Flow Fields have a special place in creative coding, and allow you to create mesmerizing generative artworks that wouldn't otherwise be possible. Tyler Hobbs, for instance, is a true master at them, and to quote him:
It's entirely possible that I've used them in more programs than any other person alive.
ECTOGENESIS, 2019 pic.twitter.com/zFFqtaO570
— Tyler Hobbs (@tylerxhobbs) June 6, 2021
Components of a Flow Field
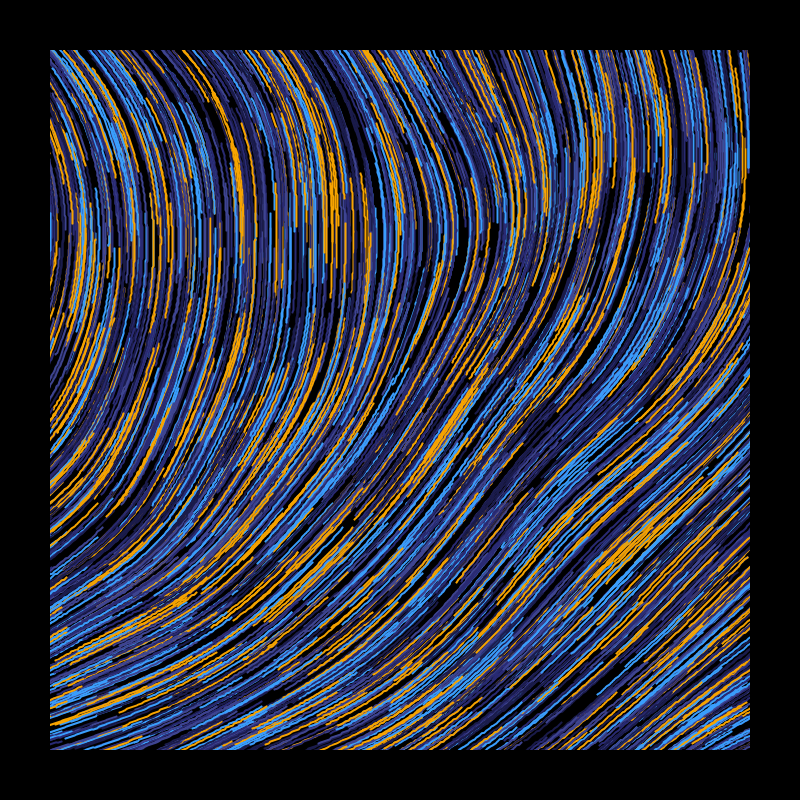
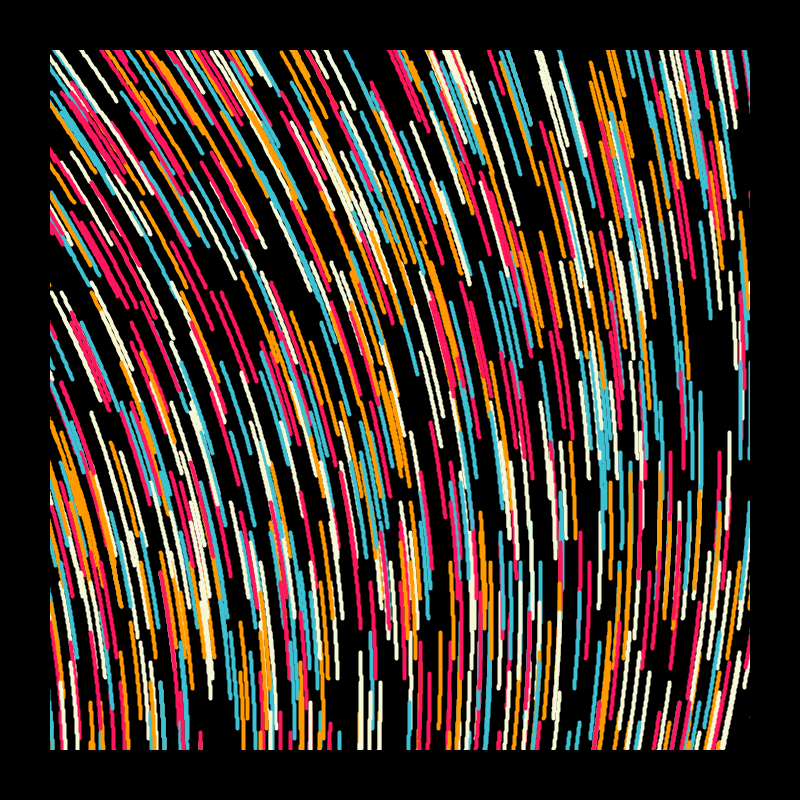
Making a flow field essentially consists of two parts, firstly creating a grid of angles, and secondly drawing flow lines whose curvature is guided by this grid. This will make more sense in a second. Since this is a little bit loaded we'll split these two parts up into separate blog posts. The grid in this one, and the flow lines in the next one.
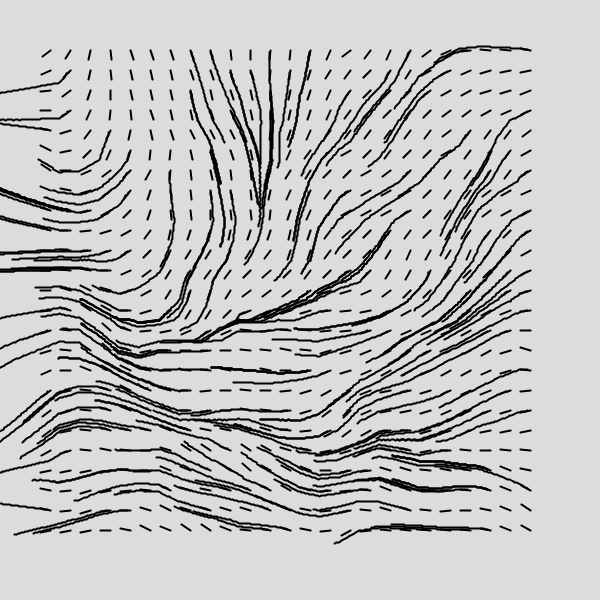
The flow lines here look a bit weird, but we'll make them look much nicer along the way.
Creating a Grid of Angles
The very first thing we'll want to do is create a custom class for the angles in our grid. This will make things more convenient for us later on.
If you're not used to Java syntax this might be a little confusing at first, especially if you're used to javascript (and/or python) which is very permissive with it's variable types. Generally, in java you need to specify the type of a variable when you first create it, and mixing between different variable types can lead to odd errors and unexpected behaviour that can take some time to debug. Let's start with a simple class in java:
class GridAngle {
  int x, y;
  GridAngle(int x_, int y_){
    x = x_;
    y = y_;
  }
}
This class doesn't do anything yet, but simply serves as an example of the syntax involved in writing a java class. The member variables are declared within the space directly after declaring the class with the class argument and class name. The constructor is designated by the class name and accepts input parameters. When creating a function, be it a constructor or any other function that accepts input parameters, you're required to specify the type of the variable by preceding it with the correct keyword, similarly to any other time you create a new variable in Java. The actual class that we're going to use has some more stuff going on, as follows:
class GridAngle {
  int x, y, r;
  float angle;

  PVector v;

  GridAngle(int x_, int y_, int r_, float angle_) {
    x = x_;
    y = y_;

    angle = angle_;
    r = r_;
    v = new PVector(x + r * cos(angle),
                    y + r * sin(angle));
  }

  void display() {
    strokeWeight(2);
    line(x, y, v.x, v.y);
  }
}
Take a second and read through the code. Here the class simply consists of a position and an angle. Processing's vector class 'PVector' will help us when drawing the the flowlines through the grid, and also allows us to visualize the grid.
Now that we have created this GridAngle class, we'll actually want to create some instances of it and store them somehow in a gridlike manner. This will require us to store our instances in an array, which is a little bit tricky in Java. Generally when creating an array in Java, you need to know it's size beforehand, to allocate the appropriate amount of space in memory. This won't work for us, since we want to have a grid that can have a different number of items depending on the parameters.
Array Lists in Java
However there is a way, using something called an ArrayList! It's essentially an array like data-structure in java, that allows easy addition and manipulation of items within it. Maybe the scariest thing about it is the way it's instantiated:
final ArrayList<ArrayList<GridAngle>> vectors = new ArrayList<ArrayList<GridAngle>>();
Let's go through this step by step! The final keyword here is similar to the 'const' keyword in javascript that declares a constant. Don't worry, this won't mean that we can't modify our ArrayList anymore, simply that we can't reassign its reference. A more elaborate discussion can be found here.
Next up, ArrayLists can only hold one data type, which needs to be specified in the space between the arrow brackets, so for example, if we were to create an ArrayList of integers, we would do it as follows:
ArrayList<int> numbers = new ArrayList<int>();
This means we can create an arraylist of arbitrary data types, even ones we create ourselves, such as the GridAngle class we created earlier:
ArrayList<GridAngle> gridangles = new ArrayList<GridAngle>();
To make this a nested ArrayList we simply create an Array List that can hold other Array Lists:
ArrayList<ArrayList<GridAngle>> gridangles
			= new ArrayList<ArrayList<GridAngle>>();
Makes sense right?
Populating the Grid
In addition to that we'll also need a couple of other parameters and a function that actually fills this ArrayList:
final int xOff = 50;
final int yOff = 50;
final int spacing = 10;
final float rez = 0.0005;
The function that fills our ArrayList will look as follows, and this is actually where we'll make use of Perlin Noise:
void createGrid() {
  for (int x = xOff; x<width-xOff; x+=spacing) {
    ArrayList<GridAngle> row  = new ArrayList<GridAngle>();
    for (int y = yOff; y<width-yOff; y+=spacing) {
      float angle = map(noise(x*rez, y*rez), 0.0, 1.0, 0.0, TAU);

      row.add(new GridAngle(x, y, 5, angle));
    }
    grid.add(row);
  }
}
Nothing special here: a nested loop to populate the nested ArrayList, the noise function to which we feed the x and y coordinates of each grid angle, multiplied by the resolution factor, and we map it to the [0,TAU] range to get an angle that is somewhere between 0 and 360 degrees.
Drawing the Grid
Later on we won't need to visualize this grid anymore, but for now it's interesting to see what it looks like. This boils down to looping over our nested array list and invoking the display function that we have created earlier as a part of the GridAngle class:
void setup(){
  size(600,600);
  createGrid();
}

void draw() {
  background(220);
  for (int x = 0; x<vectors.size(); x++) {
    for (int y = 0; y<vectors.get(0).size(); y++) {
      vectors.get(x).get(y).display();

      ga.display();
    }
  }
}
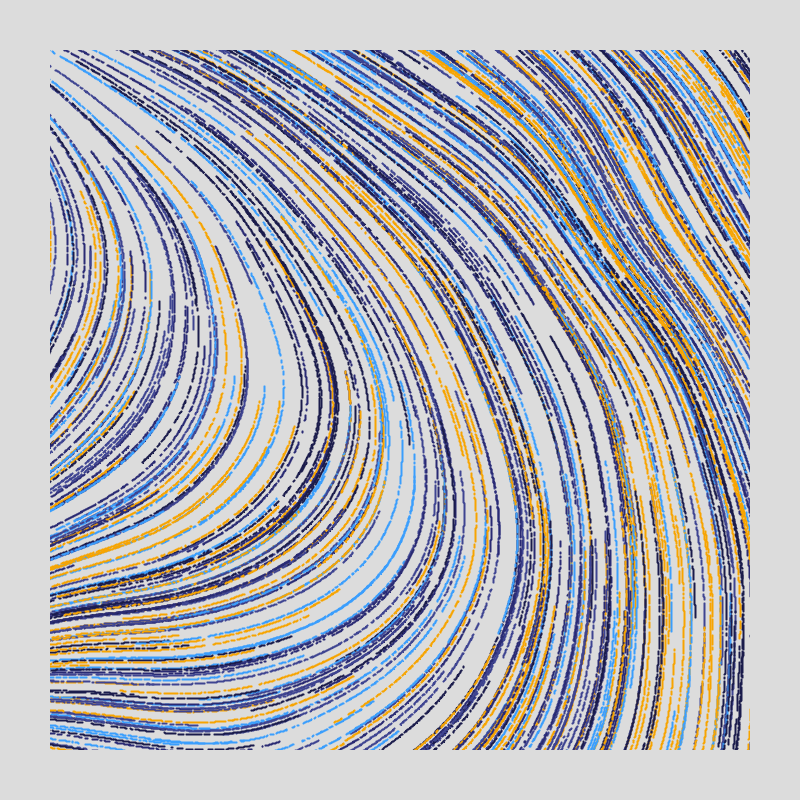
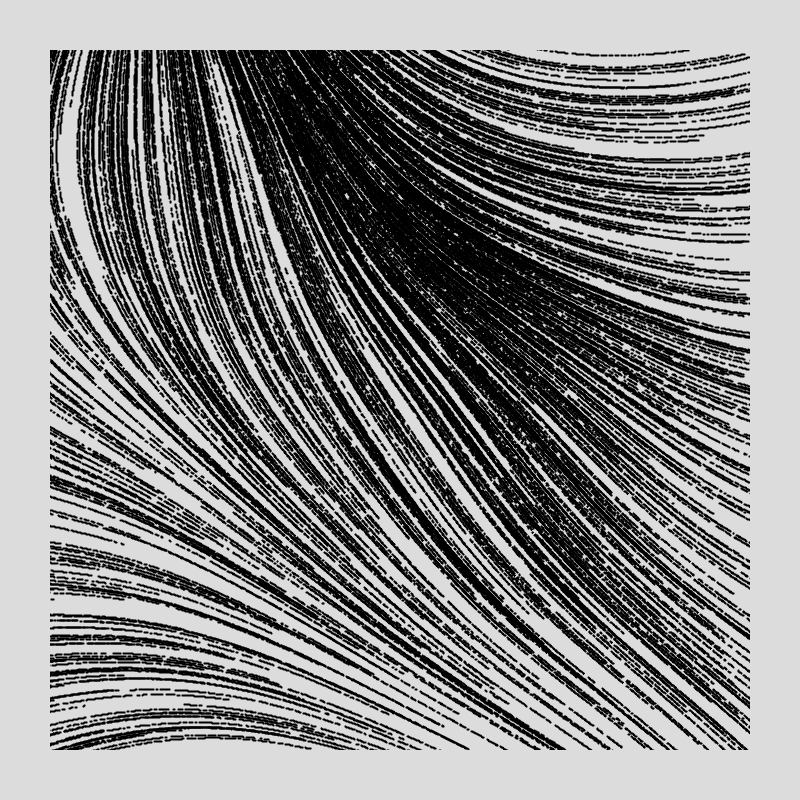
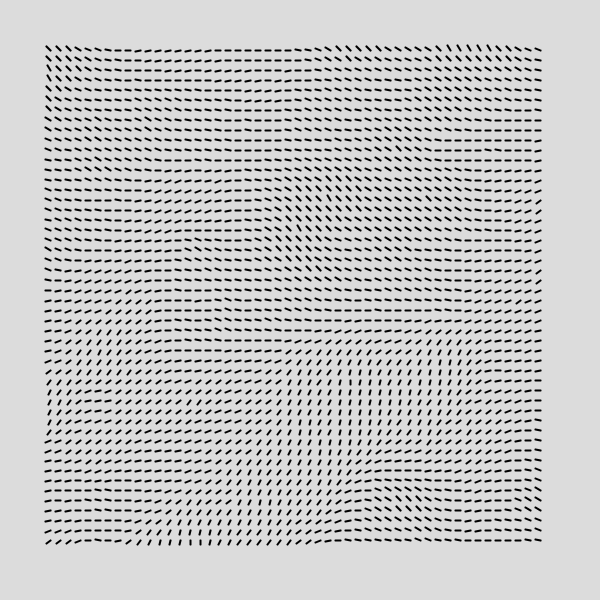
And you should see something like this:
Which almost looks like an optical illusion, the dashes seem to shift whenever you let your eyes wander over it. Great, this concludes the first part of the tutorial, and in the next part we'll cover how to draw the flowlines using this grid!
The entire code for reference:
final ArrayList<ArrayList<GridAngle>> grid = new ArrayList<ArrayList<GridAngle>>();

final int xOff = 50;
final int yOff = 50;
final int spacing = 10;
final float rez = 0.005;

class GridAngle {
  int x, y, r;
  float angle;

  PVector v;

  GridAngle(int x_, int y_, int r_, float angle_) {
    x = x_;
    y = y_;

    angle = angle_;
    r = r_;
    v = new PVector(x + r * cos(angle),
                    y + r * sin(angle));
  }

  void display() {
    strokeWeight(2);
    line(x, y, v.x, v.y);
  }
}

void createGrid() {
  for (int x = xOff; x<width-xOff; x+=spacing) {
    ArrayList<GridAngle> row  = new ArrayList<GridAngle>();
    for (int y = yOff; y<width-yOff; y+=spacing) {
      float angle = map(noise(x*rez, y*rez), 0.0, 1.0, 0.0, TAU);

      row.add(new GridAngle(x, y, spacing/2, angle));
    }
    grid.add(row);
  }
}

void setup(){
  size(600,600);
  createGrid();
}

void draw() {
  background(220);
  for (int x = 0; x<grid.size(); x++) {
    for (int y = 0; y<grid.get(0).size(); y++) {
      grid.get(x).get(y).display();
    }
  }
  save("grid.png");
  noLoop();
}