
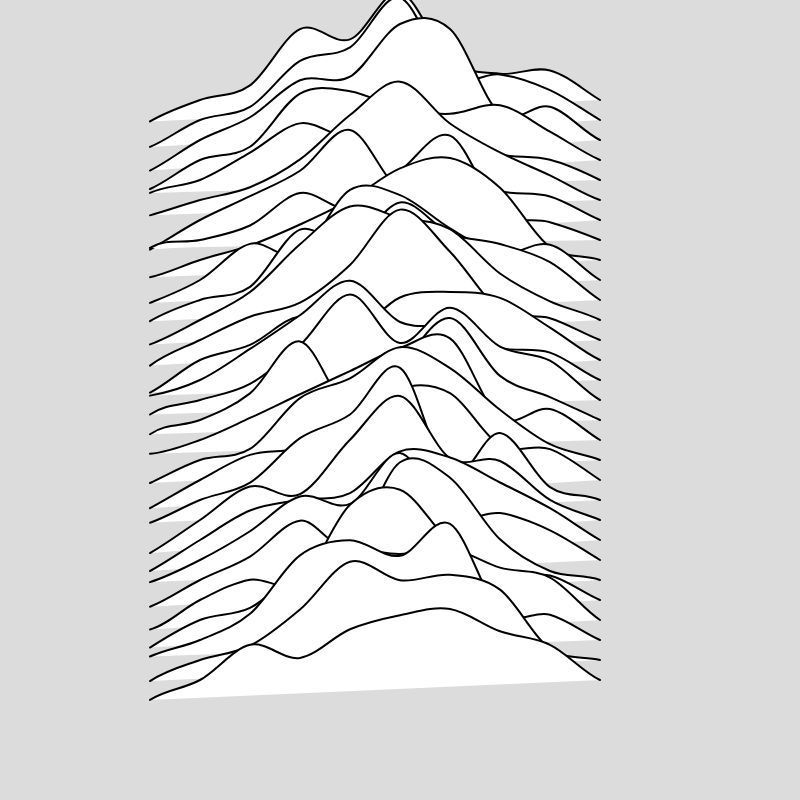
This is part three of the explorative series on Perlin Noise in p5js (and processing). In this blog post we'll have a look at making smooth curves with the curveVertex() function. We'll also be recreating Joy Division's famous album cover for 'Unknown Pleasures'!
Before starting the technical aspect of this blog post, it might be interesting to have a look at the story behind the album cover and what it represents. The original album cover was designed by Peter Saville and originates from The Cambridge Encyclopedia of Astronomy, representing radio waves from pulsar CP1919 (a highly magnetized rotating compact star that emits beams of electromagnetic radiation). Originally white with black lines, Svaille decided to invert the colors:
Saville reversed the image from black-on-white to white-on-black, against the band's stated preference for the original. "I was afraid it might look a little cheap. I was convinced that it was just sexier in black" since it represented a signal from space.
I also think that it's quite awesome that the artwork holds a meaning beyond that of simply being the cover for Joy Division's album. A little more about what CP1919 is:
In simple terms, the image is a “stacked plot” of the radio emissions given out by a pulsar, a “rotating neutron star”. Originally named CP 1919, the pulsar was discovered in November 1967 by student Jocelyn Bell Burnell and her supervisor Antony Hewish at Cambridge University. As the star turns, it emits electromagnetic radiation in a beam like a lighthouse, which can be picked up by radio telescopes. Each line on the image is an individual pulse. They’re not exactly the same each time as the long distance the beam travels introduces interference.
This is a great source of inspiration: data visualization as an artform! Next we'll get into recreating this album cover!
The Sketch
If you're not familiar with the curveVertex() function, it simply allows you to connect a number of coordinates, and rather than doing so with jagged line segments, it will draw a continuously smooth line through all the coordinates (maybe I will write a post about it in detail in the future). Before we start calling the curveVertex function a number of times, we'll have to indicate that we are drawing a new shape by calling beginShape() and conclude with endShape() after we have gone over all our coordinate points. The next example will make this much clearer.
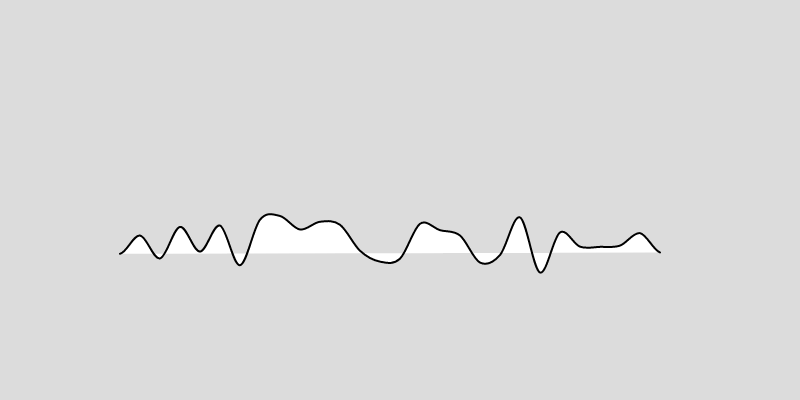
First let's simply draw a line with the curveVertex() function in p5js. We can do this by invoking the beginShape() statement before the for loop, step through several positions with the loop and then end the shape with the endShape() function call. There's probably a thousand different ways you could do this, and here's mine:
function setup() {
  windowSize = min(windowWidth,windowHeight)
  createCanvas(windowSize, windowSize);
  xOff = 50
}

function draw() {
  background(220);

  beginShape();
  for (i = xOff; i < width-xOff; i+=10) {
    curveVertex(i,200)
  }
  endShape();
}
We get something that looks pretty much like a simple line, however ours is made up of several small segments.

Next let's add some Perlin noise to deform this line. We'll want to offset the y positions of the points that make up our line. An important detail we have to consider here, is what we feed to the noise function as input and how we scale it. Remember that the noise function returns smoother noise the closer the inputs are to each other.
Our line is drawn by incrementing by 10 in the loop, let's see what that would look like:
beginShape();
for (i = xOff; i < width-xOff; i+=10) {
  curveVertex(i,height/2+noise(i)*50)
}
endShape();
This looks decent, minus the white regions. Call noFill() in the setup function to get rid of those. We also need to multiply the noise by some number to make visible (remember noise returns a value between 0 and 1). Next we'll want to have the deformation at the center to be much more prominent than that towards the edges of the line. We can do this by scaling the deformation with respect to it's distance to the center:
beginShape();
for (i = xOff; i < width-xOff; i+=25) {
  var d = dist(i,height/2,width/2,height/2)
  curveVertex(i, height/2-noise(i*0.08)*(100-d))
}
endShape();

This might not be the absolute best way to do it, as the deforming noise needs to be scaled inversely proportional to the it's distance from the center. Also notice that we changed the scaling factor and the number of steps of our for loop. However, you'll have to play with these yourself to find a look that you like.
Next up is repeating this pattern several times, which can be done by wrapping it in another loop:
for(n = 0; n<height; n+=10){
  beginShape();
  for (i = xOff; i < width-xOff; i+=25) {
    var d = dist(i,n,width/2,n)
    curveVertex(i, n-noise(i*0.08)*(100-d))
  }
  endShape();
  }
}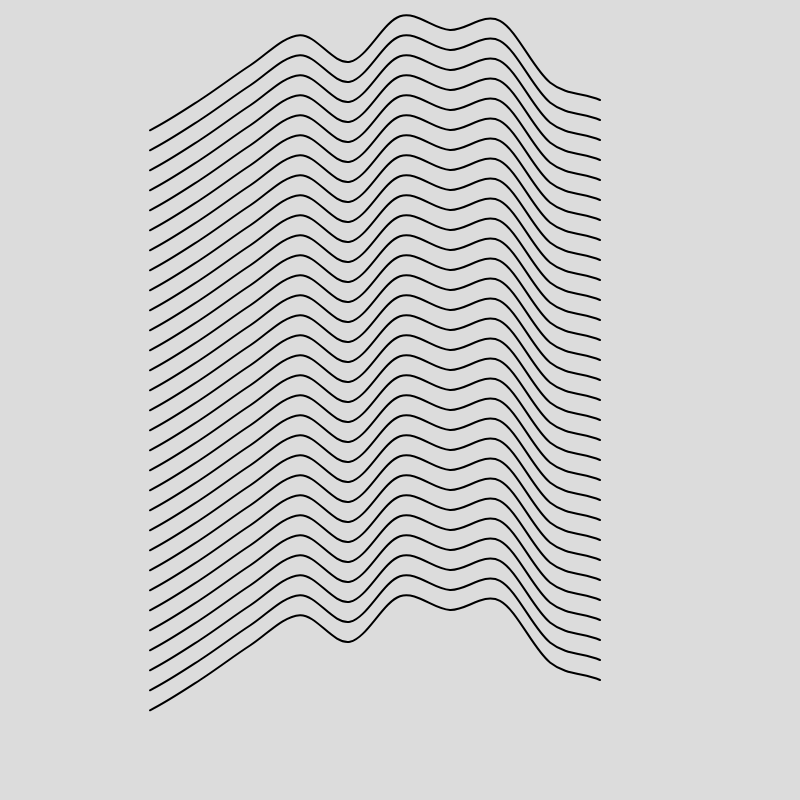
You'll notice that the pattern is the same from top to bottom, which is not what we want, we much rather want it to be different on every individual line. This is simply remedied by plugging the outer loop parameter into the noise() function alongside the inner loops iterating variable:
curveVertex(i, n-noise(n + i*0.08)*(100-d))
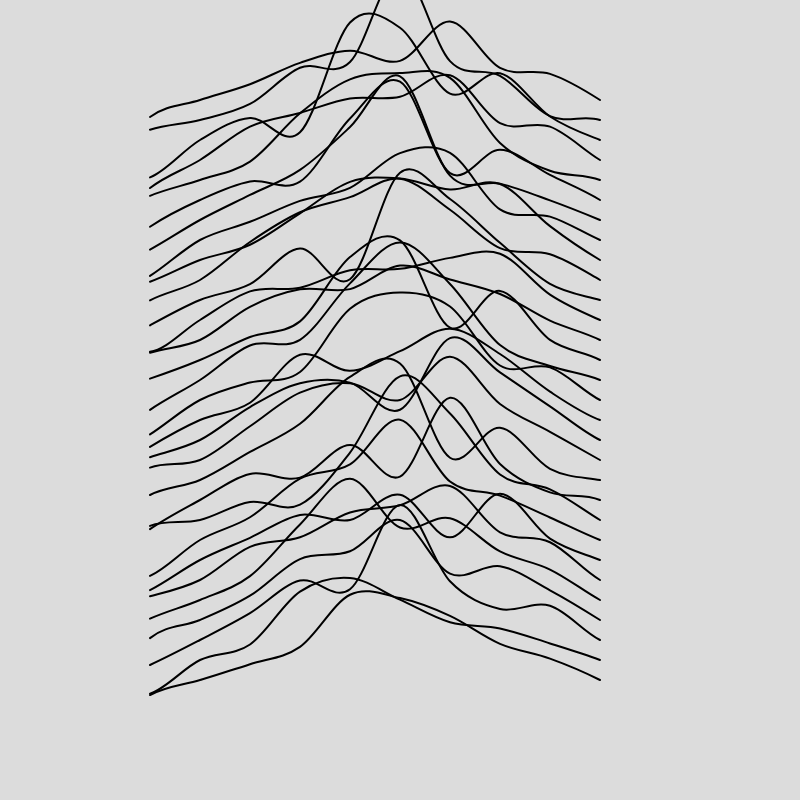
At this point we might want to bring back the fill of the shape:
The final code of the sketch will look like this:
function setup() {
  w = min(windowWidth,windowHeight)
  createCanvas(w, w);
}


function draw() {
  for(n = 0; n<height; n+=height/40){
  beginShape();
  curveVertex(0,n)
  for (i = 0; i < width; i+=width/20) {
    var d = dist(i,n,width/2,n)
    curveVertex(i,n-noise(n+i*0.08)*(width/2-d))
  }
  curveVertex(width,n)
  curveVertex(width,n)
  endShape();
  }
}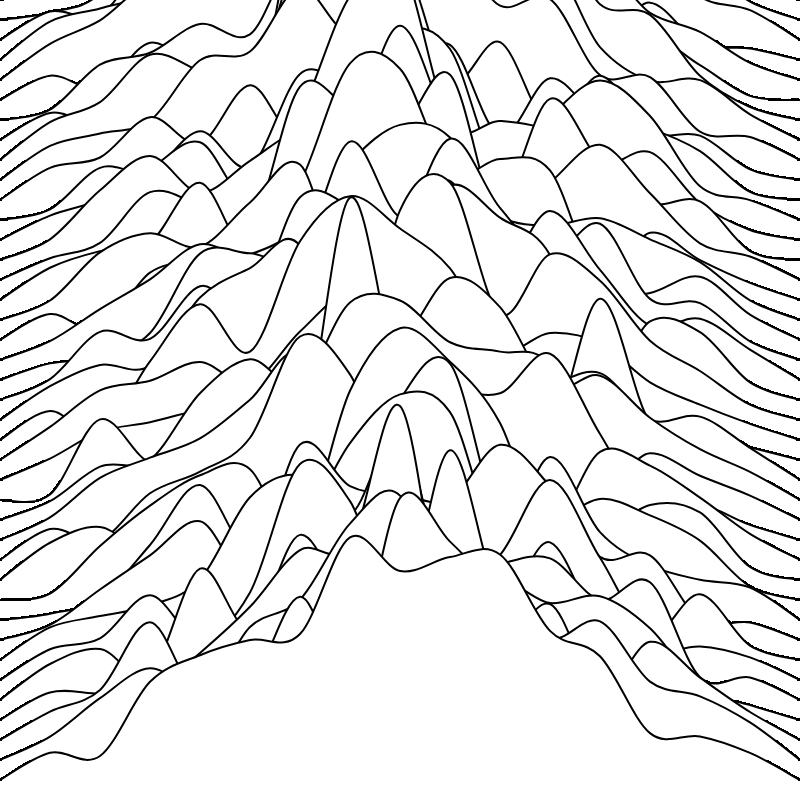
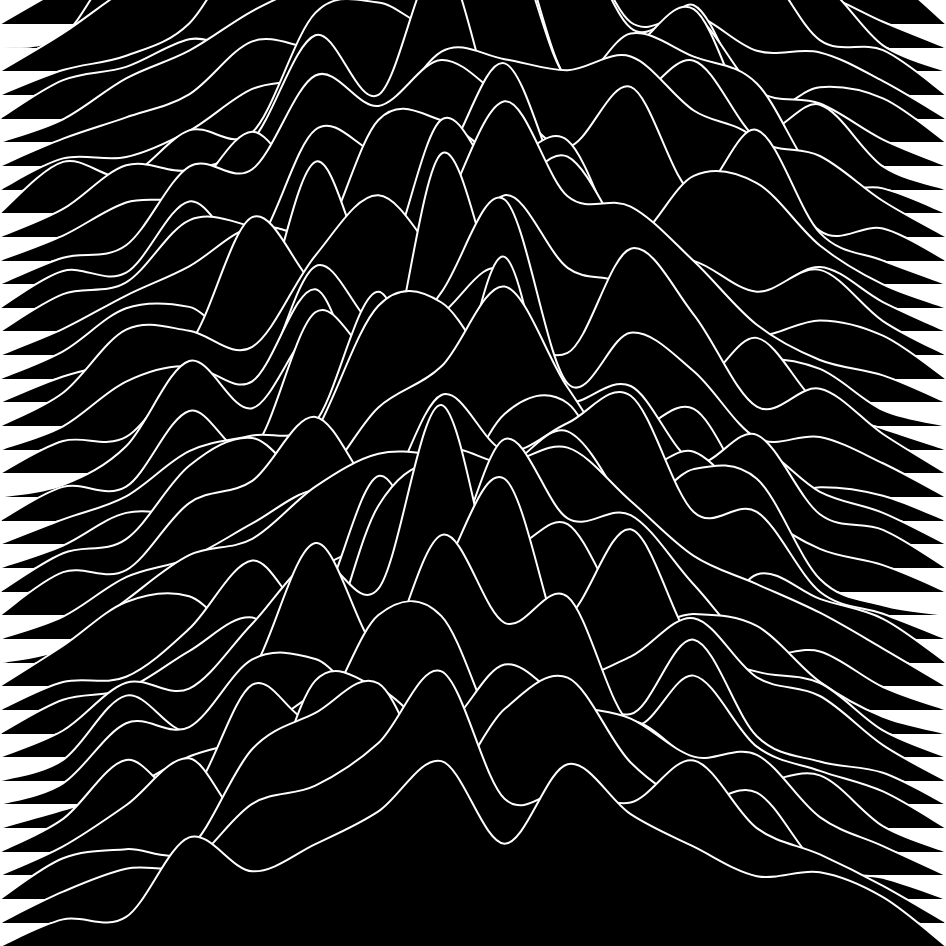
And this will work for every canvas size. Might not be exactly the same as the album cover, but the minor modifications to make it more similar are very easy to make!